
")
Abi’s Art Corner is back with another easy, step-by-step painting tutorial of a watercolour ocean sunset. Follow the instructions below to create your own, and watch the process video for any clarification on Create Happy’s Instagram (@createhappymedia) or mine (@abis_art_studio). Have fun painting!
1 - Supplies
You will need a pencil, brushes, a mixing palette, a water jar, watercolour paints (Black, navy blue, purple and pink), and watercolour paper for this painting. Thick paper will do, too.

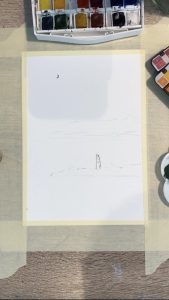
2 - Sketching and drawing gum
After taping down or securing your paper, sketch a line through the bottom third of the page. Sketch a little hill on this line, leaving a gap on the left-hand side. To form the lighthouse, sketch two lines close together in the middle of your hill, slightly slanted. Then a small, upside-down trapezium on top and a square on top of that.
Optional: If you have drawing gum, paint this over your moon, hill, and lighthouse to stop paint from going on to it. If you do not have this, it is okay. Just try to avoid painting over the lighthouse.
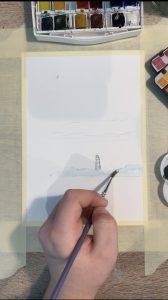
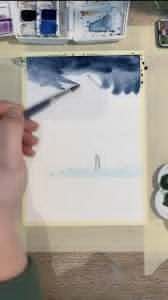
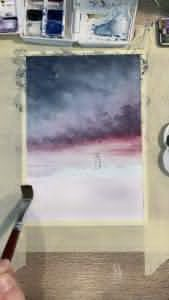
3 - Sky
Using your dark navy blue on dry paper, dragging it using a round brush down, keeping the colour rich and not diluted.
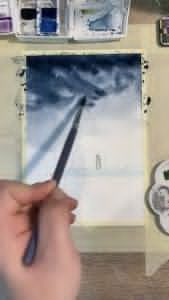
Having now dragged the blue down nearly to the hill, the bottom part should now be diluted. As such, dip your brush in more pigment and start at the top again, dragging the pigment down, but not blending it. Leaving it to spread in cloud shapes as the page is now wet.
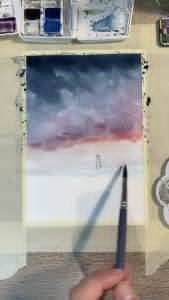
Once the blue is semi-wet/semi-dry add your purple. Bringing it up to the start of the light blue and creating a cloud. Like the front of a storm.

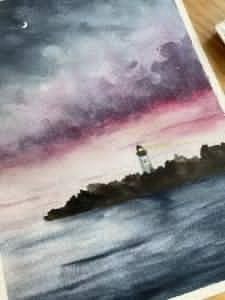
Add your pink, along the bottom of the purple cloud while still wet. Once this is done, dilute a bit of your pink and spread this colour along the bottom of the sky, filling in the white space.
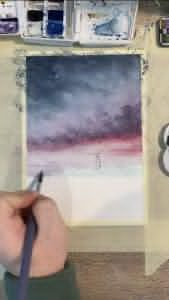
Your sky is done.
Once the sky is dry, if wanted, go over some areas with your purple, making the cloud more defined.
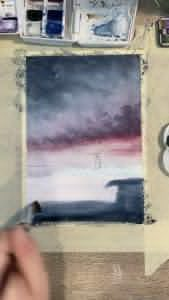
4 - Ocean
Once the sky is completely dry, wet the ocean part of your painting with water. Then paint this area with a very watered-down purple as a base.
Using the same navy blue as your sky, start at the bottom of the page and work your way up. Keeping it largely pigmented at the bottom and right-hand side.
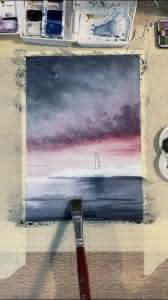
Using a flat/rectangular brush and a bit of pigment, paint a reflection of the lighthouse directly below. Drag out the pigment side to side to create the effect of waves. Do this over the ocean area with the tip of the brush. But leaving the far left corner largely absent of pigment.
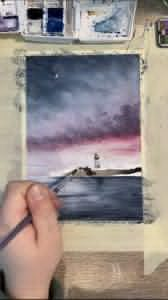
5 - Lighthouse and hill
Using your diluted navy blue, paint the bottom of your lighthouse. If there is too much pigment, use a paper towel or tissue to lift the pigment. Paint the upside-down trapezium and the top of the lighthouse black, leaving a space in the middle for the light. Paint this gap yellow. If you want, you can drag some of the pigment to the right to form the beam. At the bottom of the lighthouse paint a small curved door with your black and the outline of a window.

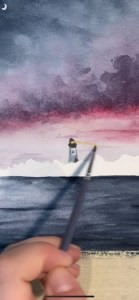
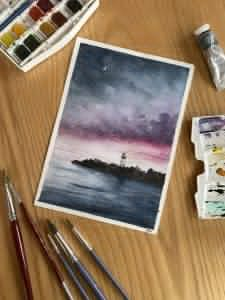
Hill: Once the lighthouse is dry, use your black to paint the hill. You can either paint it all black or leave some areas diluted as light from the moon.
And you’re done! Hope you enjoyed the process and the final result. For the process video or any questions, go to my Instagram account - @abis_art_studio